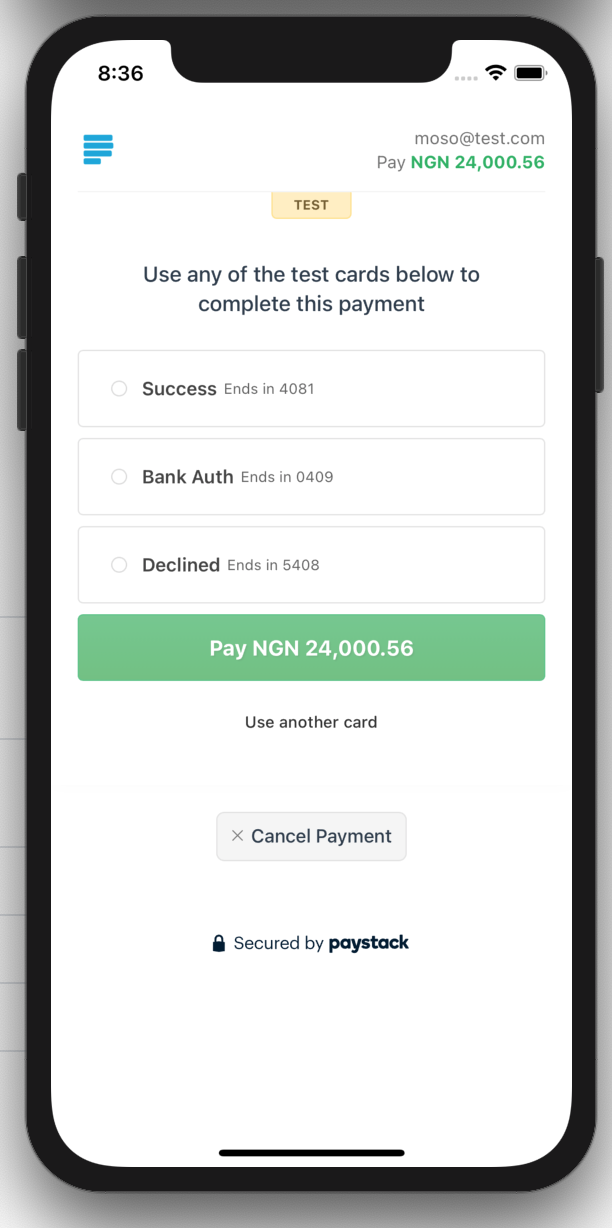
React Native Paystack WebView (v5)
Modern, hook-based, Paystack-powered payments in React Native apps using WebViews — now streamlined with Provider architecture & fully customizable.
Endorsed by Paystack, so you know you’re in good hands. Payment processing has never been this easy!

🚀 Installation
npm install react-native-paystack-webview
# or
yarn add react-native-paystack-webview
📦 Peer Dependency
yarn add react-native-webview

# iOS
cd ios && pod install

# Expo
npx expo install react-native-webview
⚡ Quick Start
Wrap your app with the Provider
import { PaystackProvider } from 'react-native-paystack-webview';

<PaystackProvider publicKey="pk_test_XXXXXX">
  <App />
</PaystackProvider>
Use in a component
import React from 'react';
import { Button } from 'react-native';
import { usePaystack } from 'react-native-paystack-webview';

const Checkout = () => {
  const { popup } = usePaystack();

  const payNow = () => {
    popup.checkout({
      email: 'jane.doe@example.com',
      amount: 5000,
      reference: 'TXN_123456',
      plan: 'PLN_example123',
      invoice_limit: 3,
      subaccount: 'SUB_abc123',
      split_code: 'SPL_def456',
      split: {
        type: 'percentage',
        bearer_type: 'account',
        subaccounts: [
          { subaccount: 'ACCT_abc', share: 60 },
          { subaccount: 'ACCT_xyz', share: 40 }
        ]
      },
      metadata: {
        custom_fields: [
          {
            display_name: 'Order ID',
            variable_name: 'order_id',
            value: 'OID1234'
          }
        ]
      },
      onSuccess: (res) => console.log('Success:', res),
      onCancel: () => console.log('User cancelled'),
      onLoad: (res) => console.log('WebView Loaded:', res),
      onError: (err) => console.log('WebView Error:', err)
    });
  };

  return <Button title="Pay Now" onPress={payNow} />;
};
🧠 Features
- ✅ Simple
checkout()ornewTransaction()calls - ✅ Global callbacks with
onGlobalSuccessoronGlobalCancel - ✅ Debug logging with
debugprop - ✅ Fully typed params for transactions
- ✅ Works seamlessly with Expo & bare React Native
- ✅ Full test coverage
📘 API Reference
PaystackProvider
| Prop | Type | Default | Description |
|---|---|---|---|
publicKey |
string |
— | Your Paystack public key |
currency |
string |
— | Currency code (optional) |
defaultChannels |
string[] |
['card'] |
Payment channels |
debug |
boolean |
false |
Show debug logs |
onGlobalSuccess |
func |
— | Called on all successful transactions |
onGlobalCancel |
func |
— | Called on all cancelled transactions |
popup.checkout() / popup.newTransaction()
| Param | Type | Required | Description |
|---|---|---|---|
email |
string |
✅ | Customer email |
amount |
number |
✅ | Amount in Naira (not kobo) |
reference |
string |
— | Custom reference (optional) |
metadata |
object |
— | Custom fields / additional info |
plan |
string |
— | Paystack plan code (for subscriptions) |
invoice_limit |
number |
— | Max charges during subscription |
subaccount |
string |
— | Subaccount code for split payment |
split_code |
string |
— | Multi-split identifier |
split |
object |
— | Dynamic split object |
onSuccess |
(res) => void |
✅ | Called on successful payment |
onCancel |
() => void |
✅ | Called on cancellation |
onLoad |
(res) => void |
— | Triggered when transaction view loads |
onError |
(err) => void |
— | Triggered on WebView or script error |
Meta Props
| Name | Description | Required? | Default Value |
|---|---|---|---|
cart_id |
A unique identifier for the cart. Can be either a string or a number. | NO |
undefined |
custom_fields |
An array of custom fields for adding additional metadata to the transaction. If not passed, a default custom field is created using the firstName, lastName, and billingName. |
NO |
[{ display_name: '${firstName + ' ' + lastName}', variable_name: '${billingName}', value: '' }] |
cancel_action |
A string specifying the action to take if a transaction is canceled. | NO |
undefined |
custom_filters |
Custom filters to restrict or specify transaction options, such as: | NO |
undefined |
- recurring: A boolean to indicate if the transaction is recurring. |
|||
- banks: An array of bank codes for supported banks. |
|||
- card_brands: Supported card brands, e.g., 'verve', 'visa', 'mastercard'. |
|||
- supported_mobile_money_providers: Supported mobile money providers, e.g., 'mtn', 'atl', 'vod'. |
Dynamic Multi-Split Payment Object structure
| Name | use/description | required? |
|---|---|---|
type |
Dynamic Multi-Split type. Value can be flat or percentage |
YES |
bearer_type |
Defines who bears the charges. Value can be all, all-proportional, account or subaccount |
YES |
subaccounts |
An array of subaccount object as defined below. e.g. {“subaccount”: ‘ACCT_xxxxxx’, “share”: 60} | YES |
bearer_subaccount |
Subaccount code of the bearerof the transaction. It should be specified if bearer_type is subaccount |
NO |
reference |
Unique reference of the split. Can be defined by the user | NO |
Dynamic Multi-Split Payment Sub-Account Object structure
| Name | use/description | required? |
|---|---|---|
subaccount |
Specify subaccount code generated from the Paystack Dashboard or API to enable Split Payment on the transaction. Here’s an example of usage: subaccount: "SUB_ACCOUNTCODE" |
YES |
share |
Defines the amount in percentage (integer) or value (decimal allowed) depending on the type of multi-split defined |
YES |
🧪 Debugging
Enable debug={true} on the PaystackProvider to get logs like:
- Transaction modal status
- Incoming postMessage data
- Success, cancel, error logs
Contributions
Want to help improve this package? Read how to contribute and feel free to submit your PR!
Licensing
This project is licensed under the MIT License.
Related Projects
Video Tutorial
Sponsorship
- Star the project on Github
- Buy me a coffee
- Like, Share and subscribe on Youtube
Thanks to Our Superheroes ✨
A huge shoutout to our amazing contributors! Your efforts make this project better every day. Check out the (emoji key) for what each contribution means:
This project follows the all-contributors specification. Contributions of any kind welcome!